Armed with your newly-taken measurements, your next stop will likely be for a pattern. Nowadays we are truly fortunate to have easy access to so many pattern companies, big and small. When you hear someone refer to the "Big Three" pattern makers, they are usually referring to Simplicity, Butterick, and McCall's, but there are soooo many more out there. It's definitely worth searching online and at smaller, independent retailers to see what's available.
In brick and mortar shops, the major pattern companies will have pattern books you can peruse, much like a large catalog, to find a project that catches your eye. The pattern themselves are usually housed in metal file cabinets categorized by company and then number. Once you have settled on a particular pattern, take out your measurements. In the catalog, you will not only see a photo of the front of the pattern envelope, but you will also see a copy of the envelope's backside. This is where all the important information is hiding. Each company has their own way of organizing this information, so you may have to search a little to find it. Don't forget to check the flap of the envelope, too! You are looking for a Body Measurements chart. Once you find it, compare your measurements to those on the chart. It is quite common to fall between two, or even three, different sizes. A good rule of thumb, is to either choose the size that fits the majority of your body, and/or choose the pattern size that corresponds with the most fitted part of your garment, usually the bust. A good pattern will include notes to help with pattern alterations, should they be necessary.
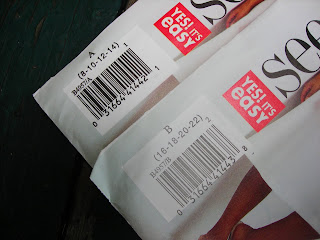
Now that you have your pattern number and your size, you will need to select it from the cabinet. Make certain you select the right size for you! Frequently, the pattern number itself will be sub-divided with a letter(s) in order to group three or four sizes into one envelope. Example, 2994A, 2994B, and 2994C. The number and letter of the pattern should be prominently displayed on either the upper right or upper left hand corner of the envelope.
Once you have found your pattern in your size, go straight to the back of the envelope yet again. Now you are getting to some fun stuff: choosing your fabric! Look for a heading entitled Suggested Fabrics. Read through the list and determine if any of the fabric types are recognizable to you. If so, go ahead and start to peruse the bolts of fabric. If you find yourself a bit confused or overwhelmed, find someone in the store to help you. These fabrics aren't hard and fast rules, but they are simply suggestions from the pattern manufacturer. When you first begin to sew, it is helpful to follow their suggestions until you learn how the different types of fabric react. As a very general rule, woven fabrics (non-stretchy) are much easier to work with than knit fabrics (stretchy). Very sheer and silky/slippery fabrics can be difficult for a beginner, too. Another helpful hint can be to not choose your fabric on the same day you choose your pattern. It never hurts to take your pattern home and study it a bit more. Look through ready-to-wear styles that might be similar to your pattern and pay attention to the types of fabrics they are sewn from. Look through your own wardrobe and find the types of fabrics that are flattering and comfortable to wear. And you can even go online and search for reviews of the pattern. I love to search through patternreview.com. I have learned so much from this site. Don't be afraid to take your time in this process!
There are a few more items on the pattern envelope that are worth talking a bit about, but I will save those for another time. Even though this post is incredibly long, I will leave you with a dinner recipe to simmer in the crock-pot while you are out pattern shopping! We have to make time for the important stuff, you know!
Sweet Lentil Stew
1 medium onion chopped
Approximately 1 cup celery, chopped
Approximately 1 cup carrots, chopped
butter to saute the above
2 cups lentils, washed
1 cup or so of chopped ham
salt
pepper
2 - 3 Tablespoons brown sugar
Saute the onion, celery, and carrots in butter until slightly tender. Combine these and all other ingredients in a 5 - 7 quart crock-pot. Add water to fill the pot. Cover and cook on low for 4 hours, or until lentils are tender. Adjust seasoning to taste, if needed.
Happy New Year! May you find lots of time and inspiration to sew and create in 2012!


No comments:
Post a Comment