Monday, August 15, 2011

Tips for Choosing Your First Sewing Pattern-Part 1

One of the classes I teach at my local sewing store is an Intro to Sew Class
that's geared for the beginner or novice sew-er. One of the questions that I get a lot is how to choose a do-able pattern. I think it is really important for the student and the teacher to work with a pattern that helps to encourage the sewing bug. It's no fun and discouraging to sew with a pattern that is too difficult or complex. Because sewing should be fun - it should be lowering your blood pressure, not raising it!

The first step is to find out your body measurements. I cannot stress enough the importance of knowing your measurements before you begin to look at patterns. The size of a sewing pattern does NOT correspond with ready-to-wear sizing. Usually you will require a couple sizes larger in a sewing pattern. I tell my classes, that it is simply a number and not to worry about it. Since you are the one making the garment, you won't be putting a size label in it anyway!


How to take your body measurements

Having your basic body measurements is an important part of learning to construct a garment. Learning how to correctly measure your body to obtain your measurements is a must! For all measurements, you will need a flexible measuring tape; these are inexpensive and widely available at all sewing and discount stores, and even sometimes at the grocery/drug store. Wearing light-weight clothing, hold the measure tape close to your body, but do not pull too tight. Do not measure over thick clothing such as a jacket or sweatshirt. A full-length mirror, and a friend, can be helpful when taking your measurements. The major body measurements are as follows,

Bust: Measure around your upper body at the fullest point of your bust.

Waist: Measure around your waist where you feel a natural “dip” in your waistline. Due to the popularity of low-rise pants, your natural waist is usually much higher than the waistband on your clothing. If in question, tie a piece of yarn, string, or elastic around your middle and sit down. As you sit, the string should naturally “roll” up or down to your waistline.

Hips: Measure around the fullest part of your hips, as you did when measuring your bust.

Back-Waist-Length: Tilting your head forward, "feel" for a protruding bone at the base of your neck. Using this bone as a starting point, measure from there down to your natural waistline.

Over time, as your skills grow, you will encounter other measurements, but the ones listed above are your solid foundation. A good sewing book is always a helpful reference, and will include charts and illustrations for measuring your body.

Now that you have your measurements, record them on your phone, write them down, tuck them in your purse - you will need them when you go shopping at the fabric store!

Stay tuned for Part Two - Getting to Know the Pattern Envelope!


Sunday, August 7, 2011

Seeing Pink


I've got a new project in the works with lots of pink. See those floral scraps? They are the remains of a vintage, linen napkin set I found long ago. I finally found just the right pinks to compliment the floral print.


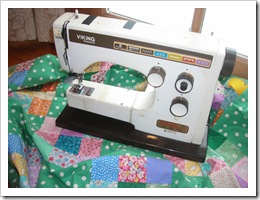
And...all of the seams were sewn on The Stylist!


I admit to not using her much since I brought her home, but decided to put her to the test this weekend, and she passed with flying colors. I do love a nice, straight seam, don't you?

Wishing you a straight-seam kind of week,

Wednesday, August 3, 2011

Feelin' blue

Or maybe it's more appropriate to say "seein' and eatin' blue!" My little, above-the-fridge freezer is bursting at the seams with sweet, sweet blueberries.

Last weekend we took a trip to Maine where we managed to pick 24 lbs. of berries in less than 45 minutes. The bushes were loaded, and the pickin' was easy. It was a beautiful day. Back in Illinois we always picked blueberries every summer, and I froze them, made jam, and baked with them all winter. This was the first time we have had the opportunity to head to a pick-your-own farm in six years! It didn't take long for our fingers to remember the familiar routine and rhythm of filling our containers.


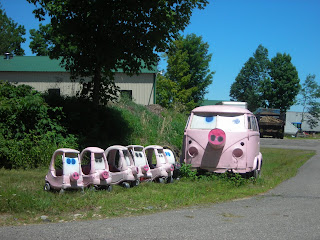
Driving in Maine is so wonderful. The scenery is breath-taking. You never know what you are going to find around each curve of the road. Sometimes you will find a little humor...

What do you think of these guys? Beauty or humor, I'll let you decide!

Once back home, most of the berries went quickly to the freezer. I want to make some freezer jam, but knew I wouldn't have time this week. I can always pull them out later to make a couple batches.

I did, however, make time to whip up a batch of these...

Blueberry Muffins
3/4 cup milk
1/2 cup canola oil
1 egg
2 cups flour (you can use 1 cup whole wheat plus 1 cup all-purpose)
1/3 cup sugar
1 Tablespoon baking powder
1 teaspoon salt
1 cup blueberries

Preheat oven to 400 degrees. Grease muffin pan. In large bowl, beat milk, oil, and egg. In medium bowl, combine flour, sugar, baking powder, and salt. Stir dry ingredients into wet with wooden spoon. Do not overmix, there will likely be lumps. Fold in berries. Spoon into prepared muffin tin. Bake for 18 to 20 minutes. Makes approximately 12 muffins.

Lovely and sweet, indeed - enjoy!
-Elizabeth

Thursday, July 21, 2011

Lucky, thrifty find

A sweet, thrifty find!


It is hard to choose, but I think these two are my favorites...


I think they have to go into a quilt, actually, two quilts since there are two complete sets. I am thinking of a scrappy nine patch block to alternate with each animal block. Such fun to think about! Planning and dreaming about the finished project is almost as fun as the actual process, don't you think?

Happy dreaming,
Elizabeth

Thursday, July 14, 2011

A little trip

A few weeks ago my daughters and I took a day-trip to NYC's famous Garment District. Boarding the bus early in the morning, and shopping until we dropped, we had a wonderful time. Even I was on fabric overload by that evening. If you ever get the chance to go - do it!

Emerging from the Port Authority bus terminal...


Our first stop was at Mood Fabrics of Project Runway fame...


Fabric everywhere!


Finding the giant needle and button!


There is a small Visitor's Center, but it is only open M-F - we were there on a Saturday. Beyond your basic maps and brochures, they will sell you a souvenir t-shirt, too!


Squeezing as much in as we could, we also did a little sight-seeing.
The NY Public Library...

The Empire State Building...only in the lobby, though. The line wrapped half-way around the block!

Rockefeller Center...

And, of course, Times Square in the late afternoon...

It was a great trip,and one we hope to repeat in the near future! I was so thankful for the Shop the Garment District blog for all of her helpful hints and great maps! It made the entire trip soooo easy! Oh, and I was fairly restrained with my purchases...mostly because I didn't want to have to carry it around all day! Next time I'll bring a much bigger bag! Here's what came home with me...

Now I'm off to (hopefully!) do some summer sewing this afternoon between snacks and the Harry Potter countdown hysteria that has invaded the Morning Glory household this week. I am fearful it may reach fever pitch within the next few hours!

Happy Summer,
Elizabeth

Monday, July 11, 2011

Summer doll


A sweet doll for a sweet niece. She will be popped in the mail tomorrow and winging her way west.

Sweet, summer wishes,
-Elizabeth

Wednesday, April 13, 2011

A Quilt, Some Geese, and Corn Chowder – oh my!

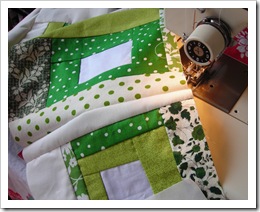
I’ve been working on the backing for a quilt top I finished waaay back when, and I am getting excited to finally see the end result.

blog stuff April 001

My original thought was to use these free-form blocks as part of a “strip” across the backing, and that’s just what I ended up doing.  As they were all different sizes, I added cream color strips on two sides to make them all equal 8 inch squares.  Then I played around with the arrangement until I came up with one I liked, and added the appropriate sized sashing between each one.  I am still mulling over my binding options.  I also need to get some more batting – I am forever running out of batting! It’s the one thing I don’t keep large pieces of on hand.  I just don’t have the room to store it, and it can be pricey to buy large quantities at one time.

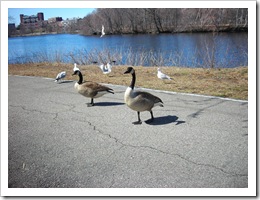
Last week ds#1 and I took a quick lunch time trip to a local park to feed the ducks and geese.  What started out as just a few…

Spring 2011 005

quickly turned into this…

Spring 2011 008

Once we ran out of food, we had to run back to the car!  They kept close to our heels all the way to the parking lot!   It made us laugh, but also glad we didn’t get nipped by their beaks!

I’ve got lots on my list to accomplish the rest of this week.  I’m  thinking of ways to streamline the evening meals to give me some more time.  I have a feeling this will likely be on the menu tomorrow or Friday.

Corn Chowder

1/4 lb. bacon

1 cup onion, sliced

1 cup celery, sliced

2 Tablespoons butter

4 cups finely chopped potatoes

1 cup water

2 (1 lb. each) cans creamed corn

2 cups milk

1 (14.5 oz.) can evaporated milk

salt and pepper

Chop and cook bacon in soup kettle.  Remove bacon and set aside to drain.  Add butter to bacon drippings and saute onion and celery until tender.  Add and cook potatoes with the water.  Once potatoes are tender, add bacon, corn, milk, evaporated milk, and salt and pepper to taste.  Heat to boiling point, remove from heat, and serve.

With warm wishes,

Elizabeth

Saturday, April 9, 2011

Pedaling forward

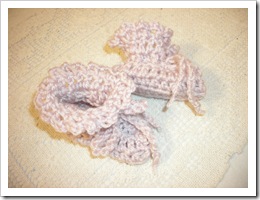
I haven’t disappeared, I’ve just been busy, busy, busy.  But aren’t all our lives like that sometimes?  So I just keep pedaling forward.  Some of my “busyness” has been in the creating department, which always feels good – much better than housework!  (Although, housework, I have to admit feels good after its done, just not while I’m in the midst of it!)  I decided to have a go at some crocheted baby booties last week at our neighborhood craft night.  For my first pair, I was pretty pleased.

Spring 2011 019


I think I will save them for a future baby gift. 


Spring is here and the crocuses are up!  As we have just moved into this house in the fall, we have been pleasantly surprised by the spots of spring color throughout our front yard.  They are so nice to come home to.

Spring 2011 043


I am looking forward to Easter, how about you?!

-Elizabeth

Wednesday, March 16, 2011

Vintage lace

March 2011 012 

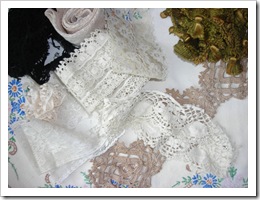
I pulled a few pieces of vintage lace  and trimmings from my stash today and just played around.  I found them inspiring, and thought I would share them with you.    Vintage lace is just amazing.   It had to be so time consuming to make, yet many were made by hand.  So inspiring in so many ways. 

Wishing you an evening of abounding inspiration,

Elizabeth

Thursday, March 10, 2011

Sweet Baby Hats

Feb March 2011 005

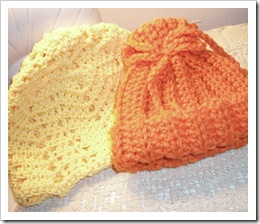
Like so many parents with school age children, I spend a lot of time in the car waiting.  Dropping off and picking up the kids are part of my daily routine in this season of my life.  I try to have portable projects to work on while I wait, and that usually means something yarn related.  These last few weeks I have been working on some knitted and crocheted baby hats for a local charity.  It’s fun to use some of the vintage patterns in my stash that I have picked up here and there, and also to hunt down free patterns on the internet.  I especially love Crochet Pattern Central and Knitting Pattern Central.  Both are such great resources! 

Feb March 2011 009

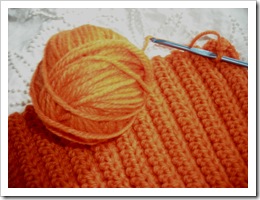
Last week I donated two knitted hats as well as three sewn hats made from some soft stretchy terry. (I squeezed in a little night-time sewing at the machine for those!) This week I switched it up, and traded my needles for a hook and have been working in crochet.  I’ve got two made and another on the hook.  Baby hats are so tiny and sweet.  They just make you feel good - to make them, to look at them, and especially to gift them.

In keeping with an “orange” theme, I will leave you with an orange cake recipe I am thinking of trying out for Easter.  If you decide to try it out too, let me know what you think!

Orange Coconut Cake

1 cup butter

2 cups sugar

4 eggs

1 teaspoon baking soda

3 1/2 cups all-purpose flour

1/2 cup buttermilk

2 Tablespoon grated orange rind

1 cup chopped pecans

1 cup grated coconut

1 cup chopped dates (optional)

In large mixing bowl, cream butter and sugar and add eggs.   In another bowl, combine flour and baking soda.  Add flour/soda mixture to creamed mixture alternately with the buttermilk.  Add remaining ingredients.  Pour into greased tube pan.  Bake at 300 degrees for 1 hour and 45 minutes or until tests done.  Can sprinkle with powdered sugar or use topping below.

Topping:

2 cups powdered sugar

1 cup orange juice

In saucepan, mix sugar and juice.  Bring to a full boil.  Remove from heat.  With a table knife or chopstick, puncture top of cake in several places.  Pour topping over cake and let stand, covered, overnight.

With Sweet Thoughts,

-Elizabeth

Monday, March 7, 2011

A little shopping

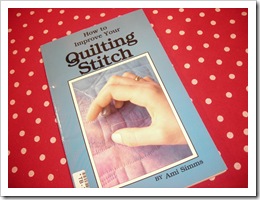
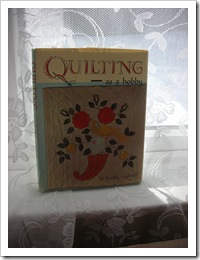
I just bought this book on ebay, and it’s filled with some great stuff!

January 2011 002

I am beginning to practice my hand-quilting skills, and this has some really, easy-to-grasp ideas and techniques.  Ami Simms has a great conversation-style voice that is easy to follow and understand.  I highly recommend this book if you are interested in taking the plunge into hand quilting.  Anybody have any others?

Now I’m off on a mission to find a perfect thimble!

-Elizabeth

Friday, February 25, 2011

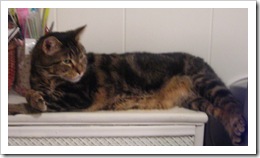
Unconditional Love


Who would believe such pleasure from a wee ball o’ fur?”

-Irish saying

Late winter 2009 183                 

                                                       Murray

                            December 2002 – February 23, 2011

Tuesday, February 15, 2011

Channeling my inner Maria von Trapp…

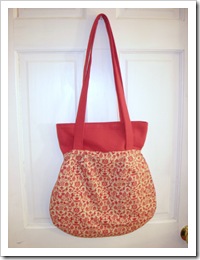
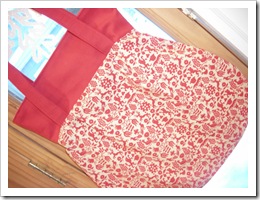
with a vintage version of Amy Butler's Frenchy Bag made from a thrifted (where else?!!) vintage curtain.

February 2011 001

February 2011 006 


One of the boys got a free gift out of this one, too, as when I  opened out the hem of the curtain, the original seamstress had used marbles as her drapery weights!  There were about 2 dozen, cat’s eye marbles -  a fun find, indeed!

It’s so cold here today!  I can’t wait for spring.  The weatherman says warm days ahead for the rest of the week, but until then, I’ve got the tea kettle on!  I hope you do, too!

-Elizabeth

Friday, February 11, 2011

More wall art

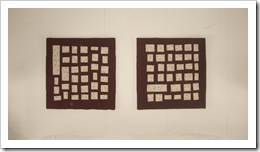
Well, I’m still hooked on the ticker tapes.  What started out as some throw pillows for our bedroom, ended up as some more wall art…

February 2011 018

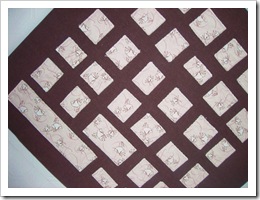
  I used a dark, chocolate-brown linen for the background fabric, and then I cut into a small piece of pink and brown floral yardage from my stash for the “tickers”.  I quilted the linen and squares to some flannel, and then washed and dried them to get the raveled and wrinkled look.   I had some large pieces of thick cardboard that I simply wrapped the finished pieces around.  I then secured them in back with tape.  This way, if I decide to use them for something else (like pillows!), I can easily remove them.  

February 2011 022

I’d like to make a few ticker tape doll quilts to stash away for gifts, too.  I love being able to use those tiny scraps that I hate to throw away.  I’ve really had a lot of fun!


Over the summer I found this little book at the thrift, and I am just now getting around to looking through it. 

February 2011 009


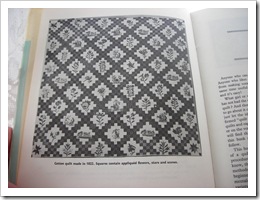
It is mostly in black and white,but the information and history is quite interesting.  There are some photos of quilts from the mid 1800’s that are beautiful, even without being able to tell their colors. 


February 2011 012

Where did these ladies find the time to dedicate to their quilts?!!  So beautiful and so inspiring.

May your weekend be filled with inspiration,

-Elizabeth

Monday, February 7, 2011

A finish

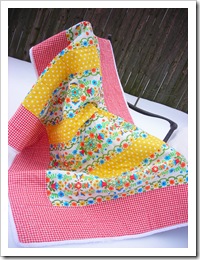
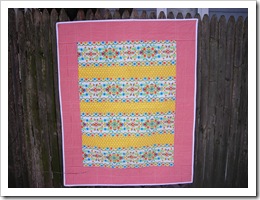
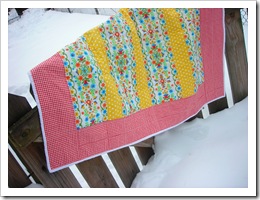
I have been inspired by all the snowy quilt photos around blogland, and it motivated me to finish up this quilt for it’s own photo shoot.

Late January 2011 029

Late January 2011 018 


Late January 2011 033


-Elizabeth

Wednesday, February 2, 2011

An exciting find

for me, at least!  Over the weekend, I popped into our local thrift and found this…

Viking 003

  A Viking 5540.  She came home with me for $9.99!  Cosmetically, she is a bit rough around the edges, but her motor runs very smoothly.  I may take her into the “machine doctor”  to have him check out the reverse button as it appears to move a little slower than I think it should (the button itself, not the actual reverse action of the motor).  Sadly, she is missing many of her extra feet – only two were included (a regular utility foot and the zipper foot) – but there were lots of extra bobbins.  There was no manual either; however, I easily found one online to download for $7.   Overall, I am thrilled to give her a new home where she will be loved and cared for.

I am enamored with vintage machines.    This love affair started mostly out of necessity.  I learned to sew on my mom’s vintage Singer and also on our high school’s older model Singer’s (home ec).  But when I went away to college, I used some graduation money to purchase a lower-end model machine (another Singer), the first “new” machine I had ever sewn on.  I took good care of it, and it saw me through college and on into the early years of marriage and parenthood.  Until, finally, it just gave up.  Not having any extra money in the family budget for a new sewing machine purchase, I began scouring the rummage sale ads until I found a 1970’s Kenmore for $30.  Two daughters were selling it from their mother’s estate, and it had been lovingly used and cared for.  I gave it a new home, and it has helped me create many, many items for my family and friends.  And so the obsession began.    Since then, I have acquired a 1940’s Singer, another 1970’s Kenmore, a 1960’s Singer, and now the Viking.  I truly love the older machines.  I think they sew beautifully, and have lots of great character.   I can feel the hands of those who have sewn on these machines before me, and I love it that my own hands are now a part of that history.

Viking 008

And on the above mentioned Kenmore, I finished this dress for my niece.  This pattern from Oliver + s is so cute.  This is the second dress I have made for her from this pattern.  I hope she likes it!

Well, it’s another snow day here on The Lane, this time with the addition of some sleet and freezing rain.  We have so much snow here in the city, there is just no where for it to go when we scoop and plow.  It looks like much of the nation has gotten hit with this latest storm.   This winter has been so crazy -  stay safe and warm!

With cozy, warm wishes from my home to yours,

-Elizabeth